Showing posts with label 3-D items. Show all posts

Tuesday, November 1, 2011

Christmas Lodge Holiday Card Set & Gift Folder!

Christmas Lodge Holiday Card Set & Gift Folder!

On www.craftProjectCentral.com if you subscribe to two months in a row or put their button on your blog and subscribe to one month you get a bonus project for that month......this is October's bonus project! It was created by Anne Marie Hile at www.stampinAnne.blogspot.com

Be sure to check both sites out for more great projects!!

xoxoxo-Heather

Saturday, October 29, 2011

"Create"

Stampin' Up! has the best variety of Vinyl home decor! I love this particular one for my Inknin' Cute Craft Room. It was easy to apply and was even easier to punch it up even more with some of Stampin' Up!'s adorable ribbon. I can't wait to share with you all of the things that I still have yet to create in my new Inkin' Cute Craft Room!
xoxoxo-Heather

My Inkin' Cute Craft Room Couch

In my apartment my craft area was in my living room. The space was crowed, but I loved having a place where my husband and/or children could sit and talk with me comfortably while I created. I am so fortunate to be able to have my own space while still enabling my family to visit with me during my crafting time.
It is funny how one mans junk is another mans treasure. My friend/downline Erika was going to get rid of this couch, seeing as how it didn't work in her place anymore. I jumped at the chance to take it off her hands! It is smaller than a regular love seat but larger than a chair. It even has a pull out bed (a small one anyway).
This couch was the first thing that was moved into my craft room after the floor was put in. Here is a pic of me and my little girl chillaxin'.

I think it is VERY obvious that I am a tad bit fond of the Flirtatious Designer Specialty Fabric that Stampin' Up! sells. I sewed four of the fat quarters together to make each panel of my curtains. You can hardly see the seems because they are gathered.
I covered the pillows with the same fabric. I got the idea from another Super talented demonstrator Mandy Erickson. She gave instructions for them, but I am not one for patterns so I figured it out by the measurements of my pillow.
The flowers were cut out using the Island Floral die (I used it on a lot of the projects in my craft room). I layered them and hand stiched them together while gathering and puckering them. I used liquid stitch to adhere them to the pillow.
The little pillow is copied directly from a display I saw at Convention......one of the MILLIONS of perks of being a demonstrator. I used liquid stitch to adhere the ribbon that wraps around the pillow. With the stripped ribbon I used my sewing machine to put a running stitch down the edge of it and the pulled and gathered it. Once the ribbon was gathered I tied a knot in one end, put some liquid stitch on it and pinned that right to the center. I circled the ribbon around the knot adhering it with liquid stitch along the way and using pins to hold the ribbon in place while the liquid stitch dried.
Here is a close up of the rosette. I had not taken the pins out yet.
I hope you are liking my Inkin' Cute Craft Room as much as I am!!!
xoxoxo
-Heather

My Inkin' Cute Craft room Business Supply area

This is the little space I have set aside for my Business Materials (Catalogs, order forms, invites etc....) Of course What would a Stampin' UP! business Supply area be if I didn't "Stampify" a little bit? I found this little Pigeon hole shelf at a Garage sale.... Actually an "After Garage Sale" they were packing everything up to go to the second hand store and said I could take what I wanted. I walked away with a TON of free stuff. All this little baby needed was a new coat of paint and it makes the perfect little display!!!
This lamp was salvaged from a sweet lady who passed away in my old neighborhood.
This is what it looked like when I stated. It is hard to tell with the lighting, but it was a dark blue before I spray painted it black.
I made the flowers with ....you guessed it.......the Island Floral Big Shot die. I layered the pieces together and used clear rhinestone brads to stick it right to the lampshade. The brads did a wonderful job of piercing the lampshade on their own.

xoxoxo-Heather

My Inkin' Cute Craft Room Fireplace

When we first decided to use this room as my Inkin' Cute Craft Room I was not too excited about the fireplace. I could think of a million things I would rather do with the wall space.
That is until I was given the idea for a wow topiary! After that I was all over having a place to showcase TWO of them!
I know, I know, I know....the vinyl is retired! I bought it way back when with the intention of using it in my house someday. That someday is here! The wreath is made with the Flirtatious Designer Series Paper as well as each topiary.


xoxoxo-Heather

My Inkin' Cute Craft Room Display Hutch

My sweet friend Liz was redecorating her living room and asked if I wanted this china cabinet. I of course said YES!!! It was a dark brown when I got it, so we put a coat of white paint on it and antiqued it a bit. I am happy with the way it turned out.
I had been looking for something for a while to display some projects that I had created or received from other very talented demos.
I don't change the displays out as often as I should, but I love the creative flare it adds to the whole room.
xoxoxo-Heather

My Inkin Cute Craft Room Paper Storage

I think you Might notice that I love me a good bargain! I have been very fortunate to be able to find such great items to make my Inkin' Cute Craft Room just the way I want it! This Display with paper shelves was a display at a craft store that went out of business (lets face it no craft store can be as awesome as Stampin' UP!) They were selling all of their paper racks and displays at crazy prices. I was just looking for a paper rack, but the manager told me that I could have the center display for free if I purchased both of the paper shelves that match.
I am sure my husband thought I was crazy for buying it seeing as how it took up almost an entire wall in our apartment living room.

It wasn't until we moved to our house that I have been able to use the display portion as display rather than storage. I thought it would be a great place to showcase my Artisan Award entries (not the actual ones, but the doubles I made).
xoxoxo-Heather

My Inkin' Cute Bathroom

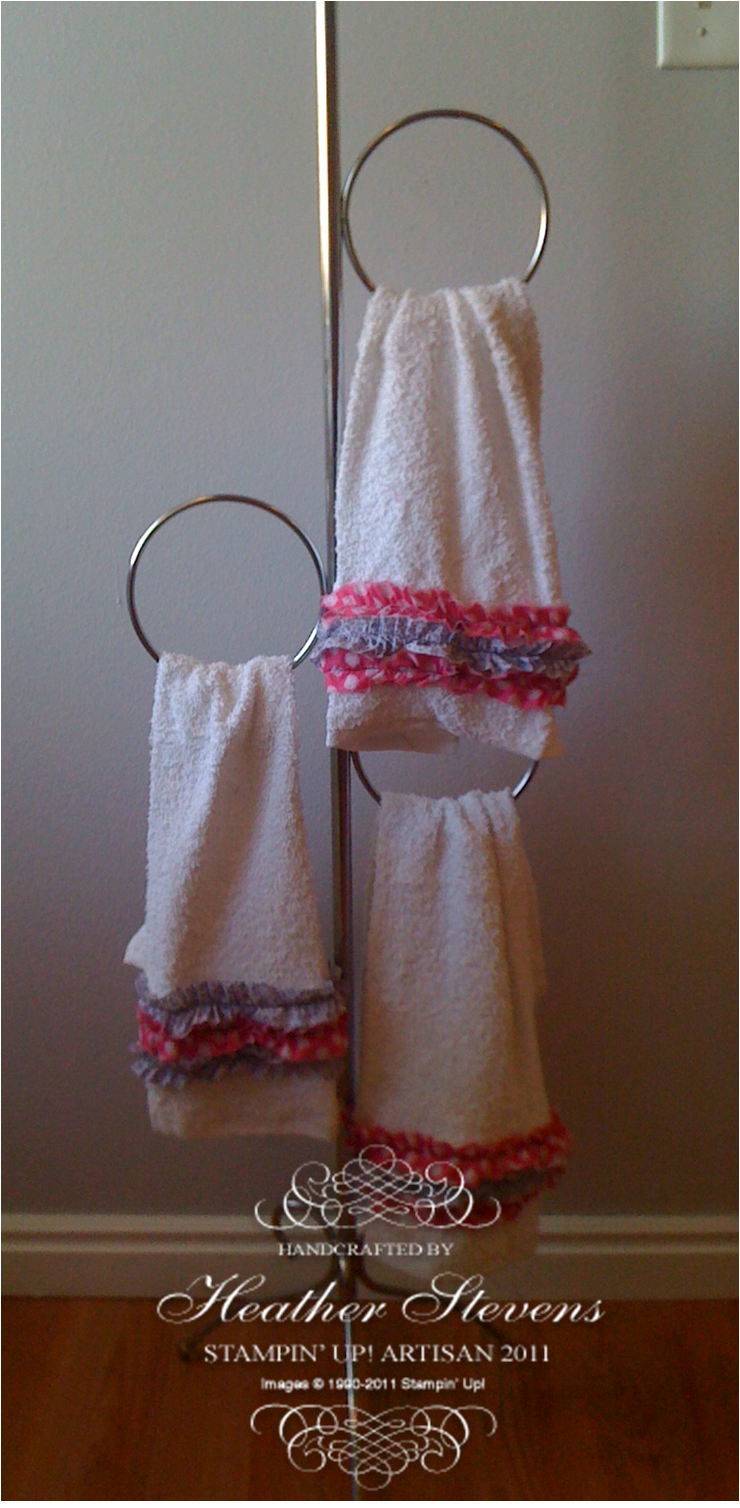
I know I showed you the bathroom towels I made for the bathroom in my Inkin' Cute Craft Room. Now you get to see the whole thing. The sink area doesn't have any Stampin' Up! stuff, but it matches everything else so I am showing it to you.Here are the towels I made. I used the Flirtatious fabric in strips on the bottoms.

This Shower curtain is one that I am Super proud of!!!! I purchased two clear curtain liners from a local dollar store. I also got the pick curtain rings from the dollar store.
I cut the flowers out with the Island Floral Big shot die (I LOVE this die). I then layered the fabric flowers and connected them with a rhinestone brad. The brad poked right through one of the Shower curtain liners attaching them to the liner. After the flowers were attached to one curtain liner I hung both liners up back to back. This will hide the back of the brads from the inside of the shower.
I attached the flowers in a pattern to look like they were flowing out of the shower head.

xoxoxo-Heather

Friday, October 28, 2011

Magnetic Christmas Countdown Calendar!

Magnetic Christmas Countdown Calendar!

We are finally to the project this month on www.craftProjectCentral.com that I designed! Get the full instructions by subscribing to October.

xoxoxo-Heather

Wednesday, October 26, 2011

Flirtatious Gift Packaging Ensemble!

Flirtatious Gift Packaging Ensemble!

I love this project!!! Subscribe to October @ www.craftprojectcentral.com to get the instructions for this fun set created by Sharon Field at www.createdBYu.blogsopt.com

xoxoxo-Heather

Friday, October 21, 2011

Christmas Tree Pyramid Box & Card!

Christmas Tree Pyramid Box & Card!


Cute little packages tied up in string – these are some fun holiday things! This little Christmas tree pyramid box

is a sweet way to package small little treats or trinkets for the holidays – and when you open it up, the sides can

unfold flat and make a pretty display. The matching card completes your gift ensemble with just a touch of

Glimmer Paper bling and country charm with the Cherry Cobbler Baker’s Twine.

Check it out at www.craftprojectcentral.com

and see more by Rose Diehl at www.RoseMarieDiehl.blogspot.com

xoxoxo-Heather

Monday, October 17, 2011

Spooky Banner

I received a call from a Concept Artist at Stampin' Up! a couple weeks ago asking me to create a Halloween project for the Artisan Album on Stampin' Up!'s very own Facebook page. I was given a week to create it and give them the supply list. Here is what I came up with....


Spooky Banner Supply list

123754 Piece of Poison stamp set

118592 Tiny Tags stamp set

113439 Big Shot die cutting machine

115950 Scallop Square bigz clear die

113464 Serif Essentials Alphabet bigz die

122334 Simply Scored scoring tool

119860 1-3/8” Circle Punch

117190 Jewelry Tag Punch

119873 ¾” Circle Punch

101227 1/16” Circle Handheld Punch

108362 Crop-A-Dial

101179 Basic black Classic Stampin’ Pad

105216 Pumpkin pie Classic Stampin’ Pad

105117 Pumpkin Pie Card Stock

121045 Basic Black Card Stock

100730 Whisper White Card Stock

117157 Neutrals Collection Patterns Designer Series Paper Stack

124005 Silver Glimmer Paper

119962 Basic Black 3/8” Taffeta Ribbon

109030 Pumpkin Pie ¼” Grosgrain Ribbon

114320 On Board Sheets

124262 White Baker’s Twine

118763 Mini Vintage Tags

124116 Mini Jingle Bells

104332 SNAIL adhesive

104430 Stampin’ Dimensionals

104294 Sticky Strip

104152 Paper Cutter

108360 Craft Scissors

The plan is for all ten of us to regularly have projects posted on the page throughout the next little while.
xoxoxo-Heather

Need for Speed Masculine Card Set!

Need for Speed Masculine Card Set!

I can't tell you how many times I have gone through my card collection thinking I need a masculine card. Well I don't have that problem anymore! This great card set has the perfect cards for those men in your life, but still has that creative touch I know you want to showcase.

Get the detailed instructions for this card set over at Craft Project Central

Kris Mcintosh is the genius who made this project Check out more by Kris @ www.stampingwithkris.com

xoxoxo
-Heather

Thursday, October 13, 2011

Everyday Elegance Simply Sent Card Kit!

Everyday Elegance Simply Sent Card Kit!

Craft Project Central is ready to show off the next amazing project! This one highlights a special that Stampin' Up! is having this month.... If you purchase two simply sent card kits from the catalog you get a FREE coordinating stamp set!!!

This delightful project was created and designed by Sharon Burkert at www.SharonBurkert.com

xoxoxo

-Heather

Monday, October 10, 2011

Witch Hat Treat Box & Pop-Up Card

Witch Hat Treat Box & Pop-Up Card


If you Love Halloween You will want to jump on over to www.craftprojectcentral.com and sign up for a subscription (only$10 for the whole month) because it will include this great project created by Monika Davis at www.stampnmad.typepad.com

xoxoxo

-Heather

Memo Board

Memo Board!

Check out what is new at www.Craft Project Central.com
This super cute Memo Board was created by Laurie Zoellmer at www.stampingnut.blogspot.com
xoxoxo
-Heather

Tuesday, October 4, 2011

Craft Project Central- October Project #2

Who is ready to see the next amazing project in store for us over at CPC? Don't forget that a $10 subscription gets you access to all of the projects you will see here AND more!!

Spa-tacular Halloween Party Ensemble

This super fun project was created for you by

Julie Edmonds at www.inkrediblestaming.com

Don't know about CRAFT PROJECT CENTRAL? This is your one stop shop for AMAZING projects!!! Learn more by clicking here: www.craftprojectcentral.com

Craft Project Central- October Project #1

I am SOOOOO excited to announce that I have been asked to be a guest designer on CRAFT PROJECT CENTRAL!!!! If you have any creative taste you will not only want to check it out, but sign up for access to these amazing projects! The subscription is only $10. Visit CRAFT PROJECT CENTRAL to subscribe to Otcober (I am designing this month so keep your eye out)

Here is the first project, How adorable is this candy portfolio box and Scarecrow Card created by KIM SCORE see her blog here www.paperpunchaddiction.com


xoxoxo
-Heather
Thursday, September 15, 2011

September Hostess Club Project

I am so excited about this months hostess club project, not just because it is Freakin' Cute, but it is also the VERY first project I created in my new Inkin' Cute Stamp Studio!!!
I focused on the holiday mini seeing as how it just came out this month, and really what is not to LOVE?

The accordion medallion was created using the new SIMPLY SCORED and Stampin' Up's SPICE CAKE Designer Series Paper both of which were just introduced in the new mini.
I covered the More Mustard circle with DAZZLING DETAILS creating a luscious bling!
I tore a one inch strip of the SPICE CAKE designer Fabric to go through one of the holes, down under the box of crayons, up and out the other hole that had been punched with the crop-a-dial and then tied a knot at the top. Now when you pull on the fabric the box will pop up and reveal the fun surprise that the cardstock is hiding. Notice that you don't have to know how to sew to use the adorable fabric Stampin' Up! has to offer? It makes a great substitute for ribbon!
I chose the Family Reunion stamp set, so my customers could choose the word or sentiment they want stamped across the front.
xoxoxo,
Heather

Tuesday, September 13, 2011

An Established Family

Decor Elements are a simple way to decorate without a lot of work. I added this piece to a mirror I got at a garage sale. I lucked out with how the curves line up so perfectly at the top. I made the display almost identical to the sample Stampin' Up created for the catalog on page 227.
The decor element "established" is perfect for any family because Stampin' Up! has it all set up for you to customize the year of your choice.
One of these days I plan on putting a real photo in that frame.xoxoxo,
-Heather